註:筆者居住於韓國,部分內容包含韓國特有的背景。
1. Private Registry 雖然好用,但管理起來太麻煩了!
雖然有些人非常喜歡 CLI,但我實在記不住命令,所以更偏好 GUI 與有跡可循的紀錄。
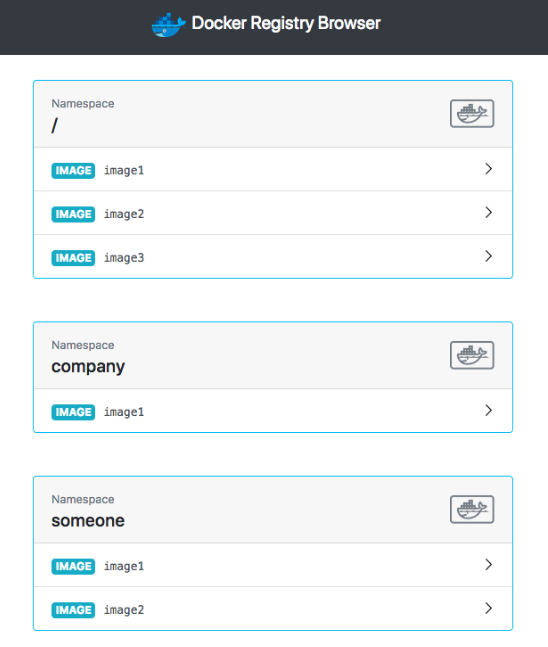
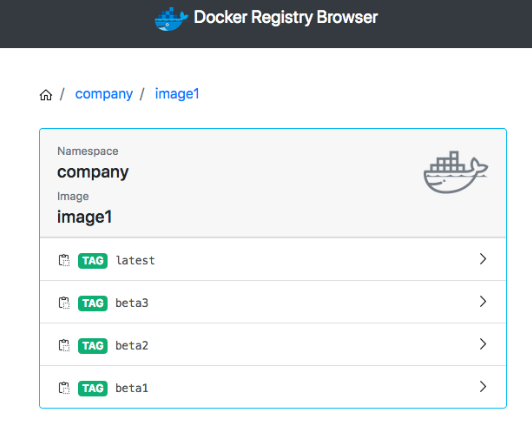
Docker Registry 也可以透過 CLI 管理,但為了更方便一點,我使用 docker-registry-browser 。
將會使用類似下圖的 GUI。
2. 安裝
將其與現有的 docker-registry-system 一同安裝。
請在原有檔案下方加上 --- 後再撰寫。
modules/docker-registry-system/deployment.yaml
- 現有 deployment
apiVersion: apps/v1
kind: Deployment
metadata:
  name: docker-registry-ui-deployment
  namespace: docker-registry-system
spec:
  replicas: 1
  selector:
    matchLabels:
      app: docker-registry-ui-app
  template:
    metadata:
      labels:
        app: docker-registry-ui-app
    spec:
      nodeSelector:
        node-type: worker
      containers:
        - name: docker-registry-ui-pod
          image: klausmeyer/docker-registry-browser:1.7.0
          imagePullPolicy: Always
          ports:
            - name: http
              containerPort: 8080
          envFrom:
            - secretRef:
                name: docker-registry-ui-secrets-sealed-secrets
modules/docker-registry-system/service.yaml
... 現有 service
---
apiVersion: v1
kind: Service
metadata:
  name: docker-registry-ui-service
  namespace: docker-registry-system
spec:
  selector:
    app: docker-registry-ui-app
  type: ClusterIP
  ports:
    - name: http
      protocol: TCP
      port: 80
      targetPort: 8080
modules/docker-registry-system/ingress.yaml
---
apiVersion: traefik.containo.us/v1alpha1
kind: IngressRoute
metadata:
  name: docker-registry-ui-ingress
  namespace: docker-registry-system
spec:
  tls:
    certResolver: le
  routes:
    - kind: Rule
      match: Host(`用來公開 UI 的 URL 範例:docker-ui.lemon.com`)
      services:
        - name: docker-registry-ui-service
          port: 80
若還想設定 Basic Auth,請參考 透過 Sealed Secrets 管理密鑰 + Traefik Basic Auth 設定 。
modules/docker-registry-system/sealed-docker-registry-ui-secrets.yaml
進入 sealed secrets GUI,新增下列 Secret。(參考 Docs Link )
- BASIC_AUTH_USER:登入 registry 所使用的使用者名稱
- BASIC_AUTH_PASSWORD:密碼
- DOCKER_REGISTRY_URL:https://<我註冊的 Registry 位址>
- ENABLE_DELETE_IMAGES:true
- SECRET_KEY_BASE:執行
openssl rand -hex 64後得到的值
apiVersion: bitnami.com/v1alpha1
kind: SealedSecret
metadata:
  name: docker-registry-ui-secrets
  namespace: docker-registry-system
  annotations: {}
spec:
  encryptedData:
    BASIC_AUTH_USER: afdfads...
    BASIC_AUTH_PASSWORD: fadvbads..
    DOCKER_REGISTRY_URL: dfd..
    ENABLE_DELETE_IMAGES: afdgd...
    SECRET_KEY_BASE: dffdf...
使用方式很直觀,建議大家直接動手試試看!
3. Registry GC
即使在 Docker Registry UI 中刪除映像檔(或透過 CLI 刪除映像檔),磁碟空間也不會立刻減少。
這是因為從 GUI/CLI 刪除映像檔時,實際上並沒有發生物理刪除,只是刪除了該映像檔的 Manifest。
真正的資料刪除,是在顯式執行 Registry GC 時才會進行。
雖然還能談得更深入,但今天先聚焦在使用方法上,細節就略過。
(如果對相關內容更感興趣,建議先閱讀 透過透明玻璃紙理論理解 Overlay FS 的使用方法與聯合掛載 (韓文)一文,再以 Docker registry 與映像檔刪除等關鍵字搜尋。)
- 執行 Registry GC
!! 注意!GC 執行期間不應在儲存庫中發生 Pull/Push。請先確認這一點再進行作業!
- 使用
kubectl get pod -n docker-registry-system找到 Registry 的 Pod。 - 執行
kubectl exec -it pod/<registry-pod-name> -n docker-registry-system -- /bin/registry garbage-collect /etc/docker/registry/config.yml來執行 GC。 - 接著在 Longhorn Dashboard 中選擇 Volume -> 點擊 Trim Filesystem 重新計算 Actual Size。
4. 結語
透過本文了解了 Docker UI 與 GC 的方法。
現在已經有了 Private Registry 與管理方法,可以放心地開發(?)伺服器,把想要的服務塞進去!
下次將介紹如何使用 CloudNativePG,在 Kubernetes 上運行資料庫。
Comments