
Note: I’m based in Korea, so some context here is Korea-specific.
Listen to the Audio We’re Going to Make (Japanese)
1. TTS?
Text-To-Speech, as the name suggests, is software that converts text into voice data.
Once you build one, you can use it across many automations without worrying about call quotas, so my goal was to build one myself.
If I’m going to build it anyway, wouldn’t it be more fun if a character I know speaks? So I’m going to fine-tune a model with custom data and build a TTS.
Among the options, I’ll be training using a model called Bert-Vits2 . For reference, it supports Chinese, English, and Japanese.
If you don’t care about character voices and just need a clean Korean voice, I’d recommend looking into Melotts and pretrained models.
One last note: after building the model, please do NOT distribute it. I strongly recommend using it only for personal research/hobby purposes.
What you need is an Ubuntu server with a GPU and patience (…).
2. Workflow
For training, you need at least 20 minutes to 1 hour of clean voice data.
Recording it yourself would be ideal, but speaking 20 minutes to 1 hour of Chinese/Japanese/English isn’t easy.
So we’ll use animation to create training material.
The idea is as follows:
- Subtitles have a start time, end time, and text data.
- Cut the audio in animation by the subtitle duration to extract voice data, and use the subtitle text as its label.
And the full process is as follows:
- Get an animation you like and its native-language subtitles.
- Load the subtitle data and animation data, and extract the dialogue parts.
- After extracting the dialogue parts, remove background music etc. via machine learning.
- Listen to each line one by one, and delete data that isn’t from the character you want.
- Now you have “voice data and label data” for “the character you want.” Train Bert-VITS2 with this data.
- Play with the finished TTS!
I’ll explain this process concisely.
3-1. Extracting Dialogue Using Subtitle Files
I’ll skip how to obtain the animation and native-language subtitles - figure that out yourself.
Go to the Github where I’ve gathered the materials I used.
After git clone, install dependencies, then put the video name and subtitle file name in extract_wav_1.py and run it.
Then 1~xxx.wav files will be automatically generated in the data folder.
3-2. Removing Background Music with UVR (ULTIMATE VOCAL REMOVER)
Go to the UVR website , download, and run.
Then configure the settings as follows:
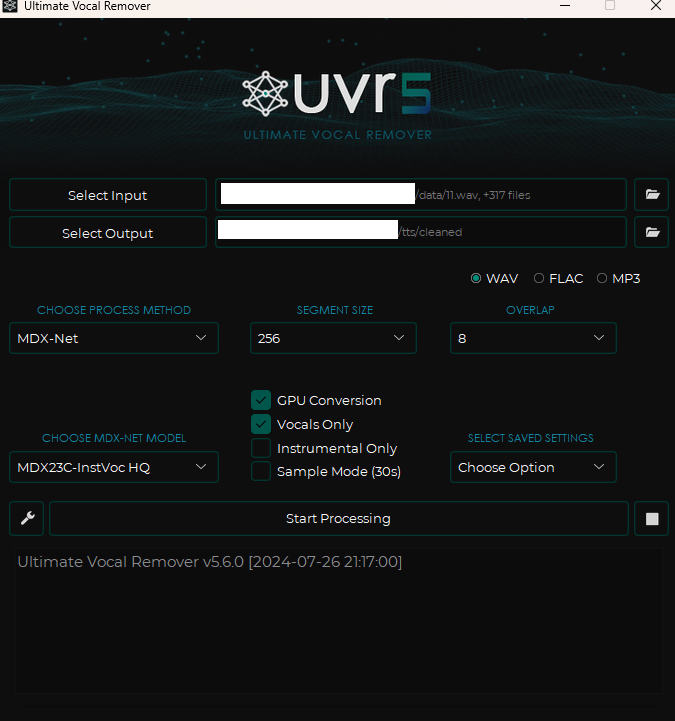
- For input, put in all the wav files you just generated.
- For output, create and use a folder called
cleaned. - For Choose MDX-NET Models, go to Download New Model -> MDX-Net, download MDX23C-InstVoc HQ, and select it.
- Turn on GPU Conversion and Vocals Only options, then run.
3-3. Manually Removing Low-Quality Audio and Other Characters’ Lines
Go into the cleaned folder and remove low-quality audio (when footsteps or sound effects are mixed in, when speech overlaps) and other characters’ lines. (Delete the files.)
3-4. Creating Label Data
Run change_name_2.py to rename the files in the cleaned folder,
then run make_list_3.py to create a file called esd.list.
3-5. Checking the Length of Collected Data
Run calculate_length.py to check how many minutes/seconds of data you’ve collected.
3-6. Repeating
If you don’t have enough data, repeat the previous steps until you do.
Create a folder named after the character in a separate directory, and arrange it as follows:
CharacterName/
  ㄴesd.list
  ㄴraw/
    ㄴf6df34d9-01c4-4db9-97e9-a35795a5f64b.wav
    ㄴ18bcc2c6-3e23-427c-a04a-9414b6f0b85e.wav
    ...
Open esd.list in a text editor and keep appending content, and inside the raw folder, paste the wav files from cleaned.
Repeat until the total file length reaches 20 minutes to 1 hour.
3-7. Training the Data
Move to the Ubuntu server.
If CUDA isn’t installed on Ubuntu, search “Ubuntu CUDA install” and install CUDA.
Clone the Bert-Vits2
repository, create a virtual environment
, then run pip install -r requirements.txt to install dependencies.
Then run python webui_preprocess.py.
Then connect to the Gradio environment and download/place each file in its location.
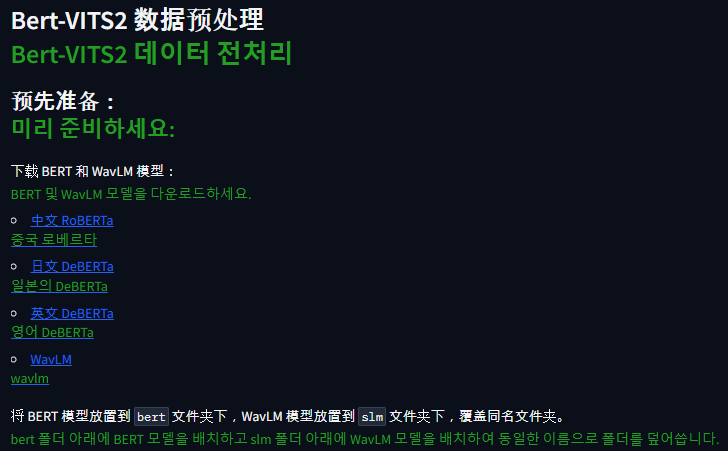
Chinese RoBERTa -> Download flax_model.msgpack, pytorch_model.bin, tf_model.h5 into the BERT_VITS2/bert/chinese-roberta-wwm-ext-large folder.
Do the same for the others - download the large files and place them.
Japanese DeBERTa -> Bert-VITS2/bert/deberta-v2-large-japanese-char-wwm folder
English DeBERTa -> Bert-VITS2/bert/deberta-v3-large folder
WaveLM -> Bert-VITS2/slm/wavlm-base-plus folder
Then create a Bert-VITS2/data/{character name} folder and move the training data.
Bert-VITS2/
ㄴdata/
  ㄴElaina/
    ㄴesd.list
    ㄴtrain.list
    ㄴval.list
    ㄴraw/
        ㄴf6df34d9-01c4-4db9-97e9-a35795a5f64b.wav
        ㄴ18bcc2c6-3e23-427c-a04a-9414b6f0b85e.wav
        ...
Here, esd.list is the file you just created. val.list is the last 5% of esd.list copy-pasted, train.list is everything else (esd.list minus what’s in val.list) copy-pasted.
Example:
esd.list
f6df34d9-01c4-4db9-97e9-a35795a5f64b.wav|Elaina|JP|ありがとう
b234c567-d890-1234-e567-890f123g4567.wav|Elaina|JP|おはよう
c345d678-e901-2345-f678-901g234h5678.wav|Elaina|JP|すみません
d456e789-f012-3456-g789-012h345i6789.wav|Elaina|JP|さようなら
e567f890-0123-4567-h890-123i456j7890.wav|Elaina|JP|元気ですか?
train.list
f6df34d9-01c4-4db9-97e9-a35795a5f64b.wav|Elaina|JP|ありがとう
b234c567-d890-1234-e567-890f123g4567.wav|Elaina|JP|おはよう
c345d678-e901-2345-f678-901g234h5678.wav|Elaina|JP|すみません
d456e789-f012-3456-g789-012h345i6789.wav|Elaina|JP|さようなら
val.list
e567f890-0123-4567-h890-123i456j7890.wav|Elaina|JP|元気ですか?Once you’ve gotten this far, go back to Gradio and configure as follows:
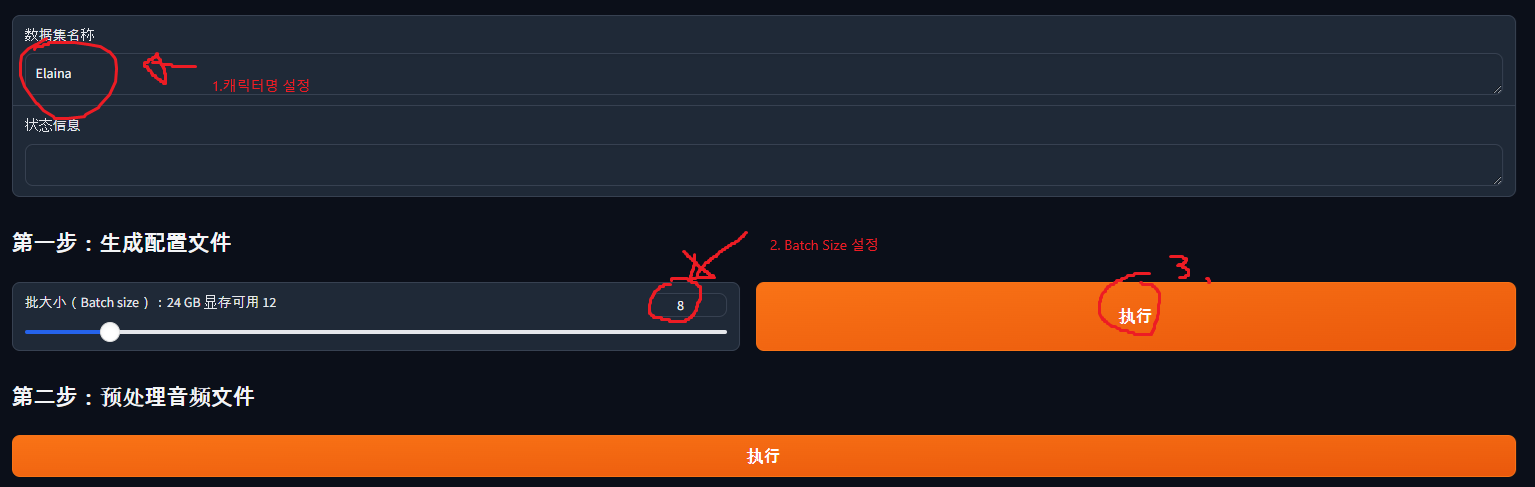
- Enter the character name (in my case, Elaina).
- Choose batch size. The bigger the batch size, the faster the training, but if it’s too big it won’t fit in GPU memory. In my case I have a 3090, so I set it to 12 - try a big number first and reduce if needed.
- Once configured, press the button.
When you press the button, a Bert-VITS2/config.yml file is created. Edit this file:
- On line 7, change the “Data/” part to “data/{character name}” (in my case data/Elaina).
- On line 20, change in_dir from “audios/raw” to “raw”.
- On line 22, change out_dir from “audios/wavs” to “wavs”.
- On line 29, change transcription_path to “filelists/esd.list”.
Then go back to Gradio and press, in order: 第二步:预处理音频文件 (Step 2: Preprocess Audio Files), 第三步:预处理标签文件 (Step 3: Preprocess Label Files), 第四步:生成 BERT 特征文件 (Step 4: Generate BERT Feature Files).
Then download the pretrained model.
Go to this link and download DUR_0.pth, D_0.pth, G_0.pth, WD_0.pth into the data/{character name}/models folder.
Then change config_path on line 90 of config.yml (the train_ms section) to “configs/config.json”.
Then in the Bert-VITS2 folder, run torchrun --nproc_per_node=1 train_ms.py and training will begin!
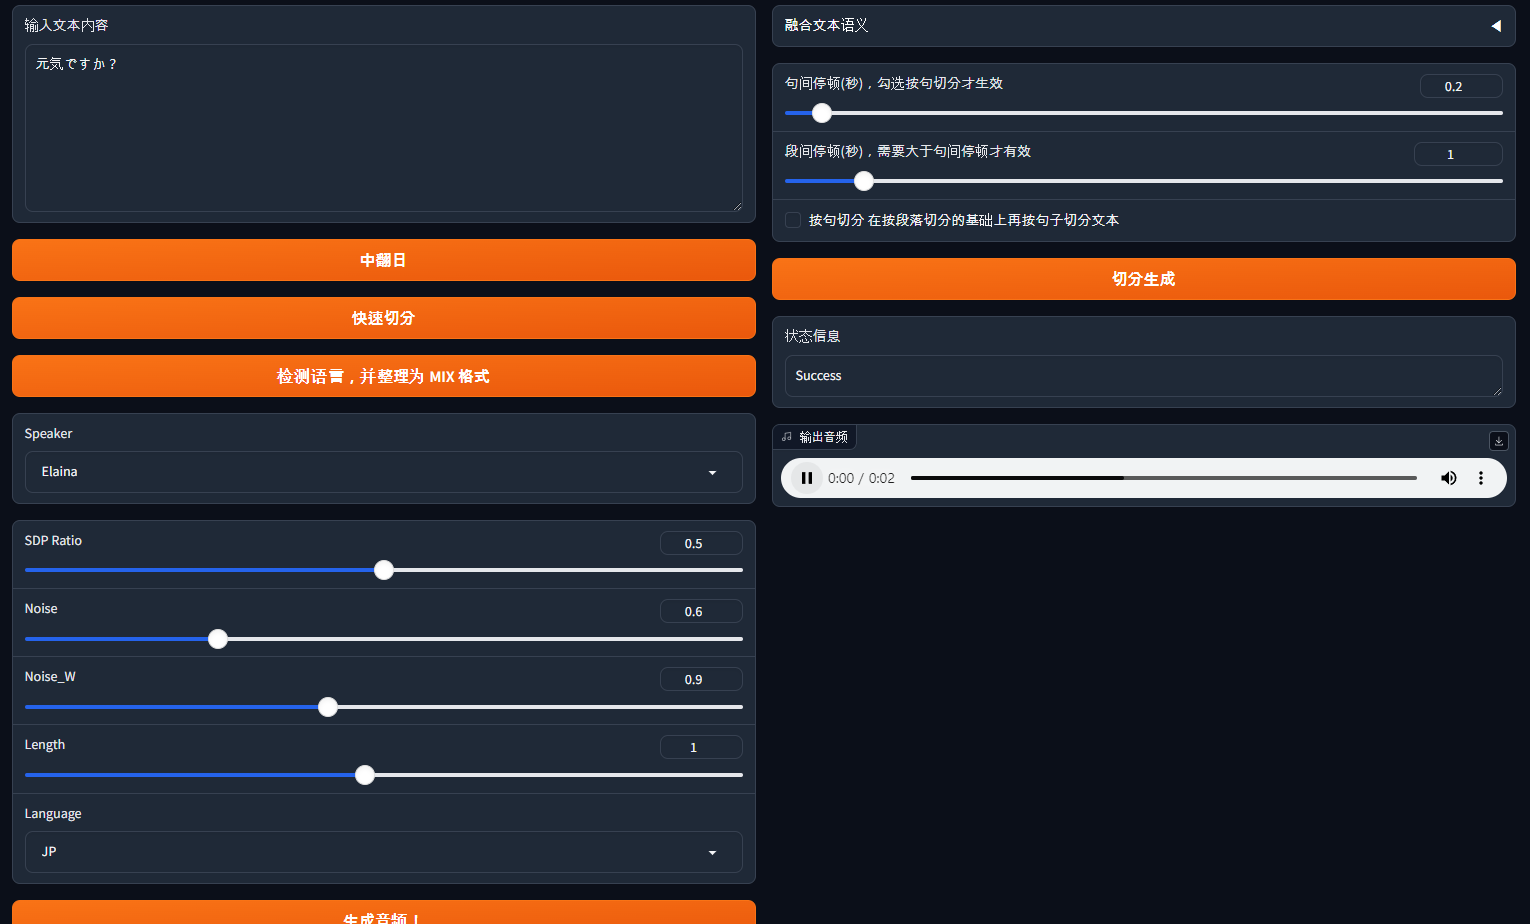
3-8. Generating Audio
While training progresses, you need to check whether voice is generated properly.
In the data/{character name}/models folder, you’ll see various files generated as training progresses, like G_1000.pth.
The G_xxxx.pth file is the file used to generate voice.
Check that folder, then change model on line 105 of config.yml (the webui section) to “model/G_xxxx.pth” (where xxxx is the model in your current directory).
Then in the Bert-VITS2 folder, type python webui.py and Gradio will appear, and you can test TTS in that Gradio.
By the way, if you want to build a separate server using this data, check out hiyoriUI.py! It provides a fastAPI-based server.
Wrapping Up
That was a brief look at how to make a TTS.
There are a lot of gaps along the way - that’s because there are similar articles out there, so I focused on the parts that confused me.
Chapter 4. Bert-VITS2 Pre-Training Setup and Training Start
If you read the article above alongside this one, the gaps in this one will become clearer.
In my case, I’ve ported the TTS to a separate machine learning server I run, and I’m using it well.
If something doesn’t work, feel free to leave a comment, and I hope you enjoy making TTS too!
Comments