Note: I’m based in Korea, so some context here is Korea-specific.
The project I’m introducing this time is a service called Uptime Kuma, which records the uptime of your servers.
You can monitor your own clusters/servers, and when something goes wrong, it can notify you that the server is down through various channels like Telegram, Slack, Discord, E-mail, and so on.
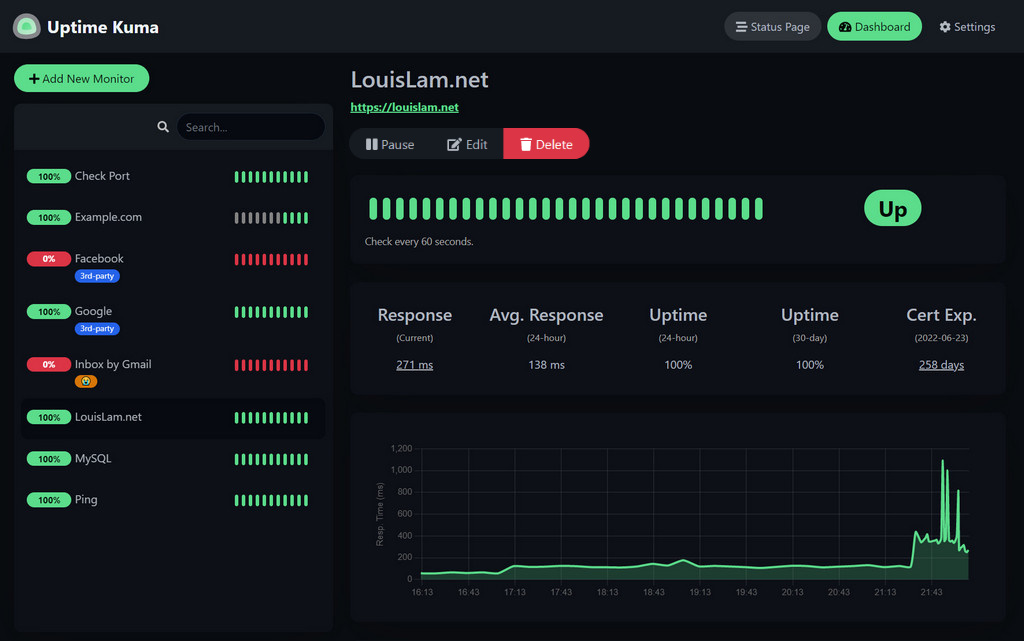
This is what it looks like!
If you visit the GitHub address ( Link ), you can also try out the demo service.
I covered the introduction to Fly.io extensively in my previous post (Introducing Fly.io and Recommending a Service That Fits Well on Fly.io (VaultWarden) ), so please refer to that post, and in this post I’ll focus only on the installation method.
1. Create the fly.toml file
- Go to a suitable location and run
flyctl launchto create the fly.toml file.
2. Create a volume
- You need a Volume to store monitoring records, ID/Password, etc.
- You don’t need that much volume, so in my case I created it with 1GB.
flyctl volume create uptime_kuma_data --region nrt --size 13. Modify the fly.toml file
- Please refer to the following toml file when writing your deploy file.
# The app name is the value you set when you ran flyctl launch.
app = "lemon-uptime-kuma"
kill_signal = "SIGINT"
kill_timeout = 5
processes = []

# Added :1 is the Debian Stable Build.
# https://hub.docker.com/r/louislam/uptime-kuma
[build]
  image = "louislam/uptime-kuma:1"

[env]

# Added, mounts the Volume created earlier.
[mounts]
source="uptime_kuma_data"
destination="/app/data"

[experimental]
  auto_rollback = true

[[services]]
  http_checks = []
  internal_port = 3001 # Changed, by default Kuma uses port 3001 internally.
  processes = ["app"]
  protocol = "tcp"
  script_checks = []
  [services.concurrency]
    hard_limit = 25
    soft_limit = 20
    type = "connections"

  [[services.ports]]
    force_https = true
    handlers = ["http"]
    port = 80

  [[services.ports]]
    handlers = ["tls", "http"]
    port = 443

  [[services.tcp_checks]]
    grace_period = "1s"
    interval = "15s"
    restart_limit = 0
    timeout = "2s"
4. Deploy!
flyctl deploy Run this command to deploy.
5. Connect and set up your ID/Password
Connect via <app-name>.fly.dev, or
if you don’t know the address, go to https://fly.io/apps, select the app, and grab the address.
After that, set up your ID/Password.
6. Add monitoring
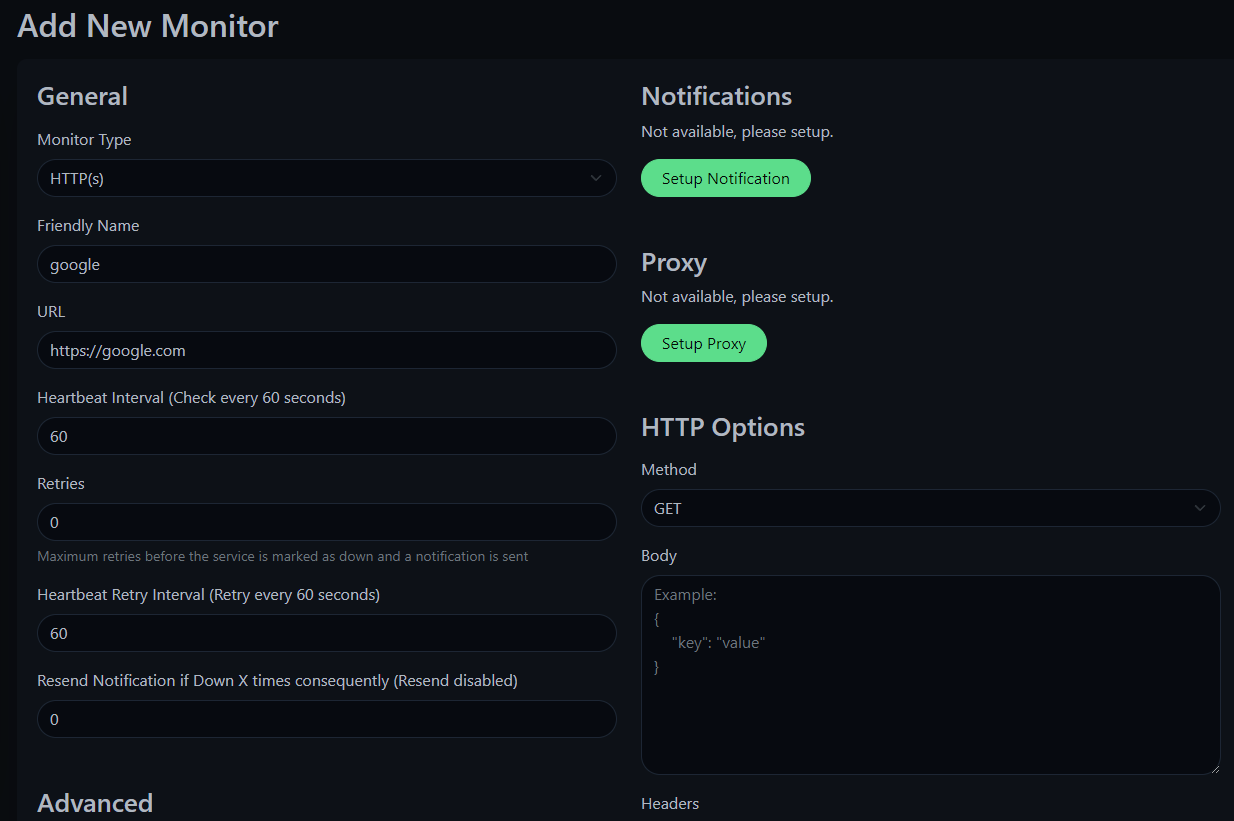
Click Add New Monitor and configure as follows.
After you press the Save button..
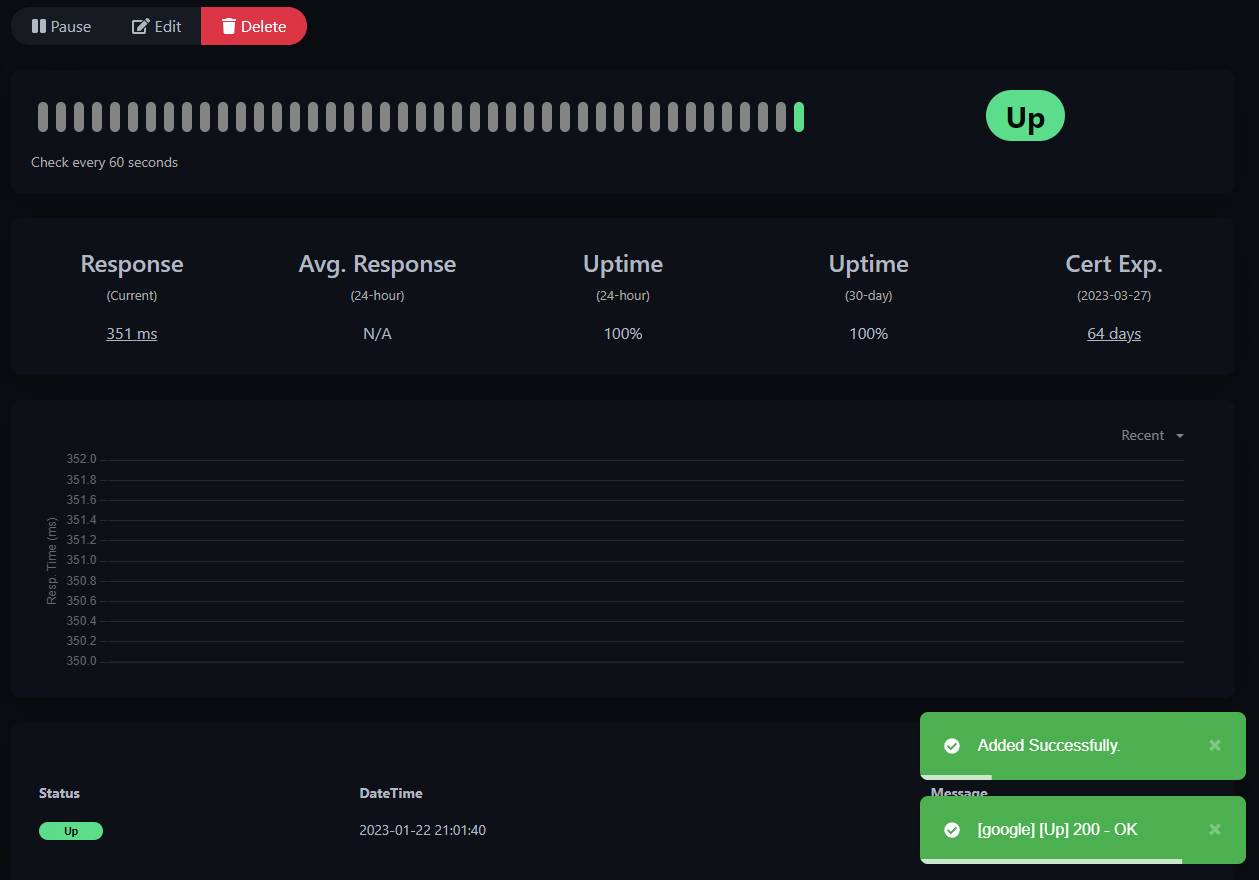
Monitoring works correctly!
Appendix 1. TMI
- It supports Korean! You can change the language setting in Settings -> Appearance.
Appendix 2. Using a Custom Domain
In my case, I have my own domain, so I want to integrate it.
Go to the app page and grab the IPv6 address. (IPv4 is a Shared IPv4, so I used IPv6.)
Go to your DNS page, select the
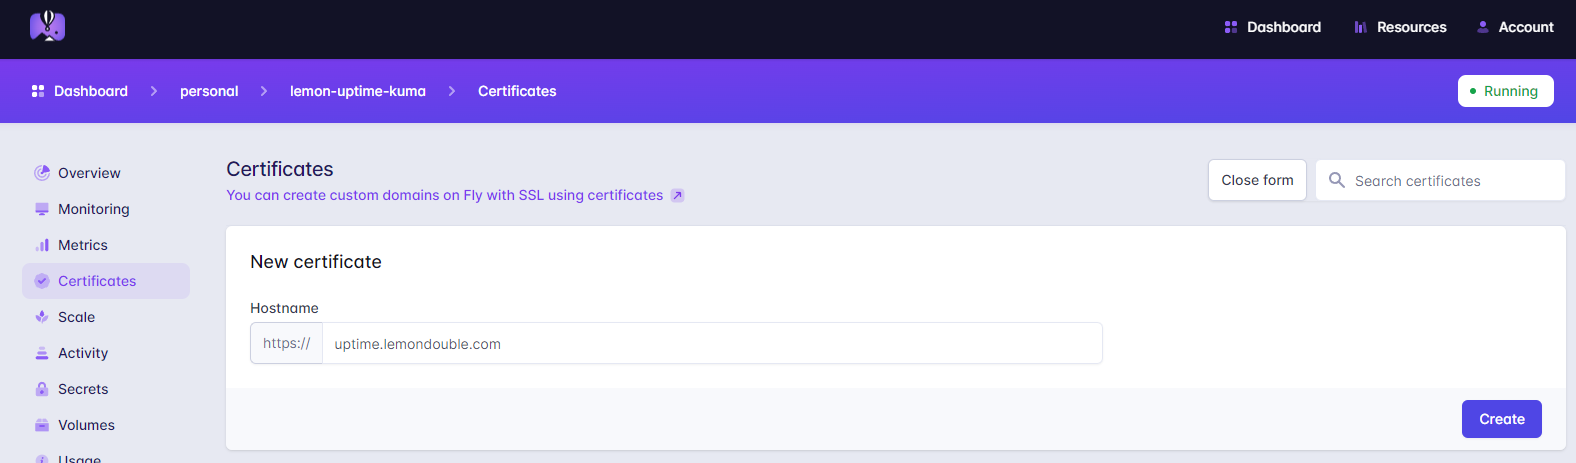
CNAMEtype, and enter<app-name>.fly.devas the value.Then go to the https://fly.io/apps dashboard, click the kuma app -> Certificates -> Add Certificate, and enter the custom domain you set up.
- After a moment, you’ll see that you can access it via the custom domain you created!
Comments