
Note: I’m based in Korea, so some context here is Korea-specific.
Fly.io is a company that lets you easily deploy a Docker image to a specific country (or region) — all you need to do is prepare the Docker image.
After signing up, once you write a fly.toml file appropriately and run
flyctl deployit does all the heavy lifting: uploading the image to the server and handling DNS, HTTPS setup, IP allocation, and monitoring (Grafana) configuration for you.
It also lets you scale up with just a few clicks. You could set all this up yourself, but Fly.io takes care of a lot of the tedious work, which makes things very convenient.
On top of that, even the free tier offers the following spec.
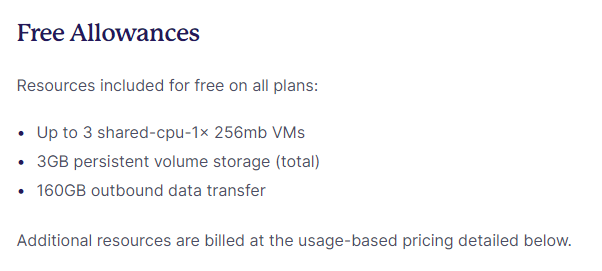
But since it’s a free tier, the spec isn’t exactly generous. So it’s best suited for “applications where data management is important enough that you want to use a cloud service, but that don’t consume a lot of compute resources.”
I’m going to write about installing Vaultwarden, a password manager that fits exactly that use case.
VaultWarden (a Bitwarden-compatible server)
Bitwarden is a password manager that lets you share passwords across multiple devices via web browsers, Windows, iOS, and Android apps.
If you’ve ever used Chrome, the easiest analogy is the “Chrome autofill” feature.
On top of that, Bitwarden also supports OTP,
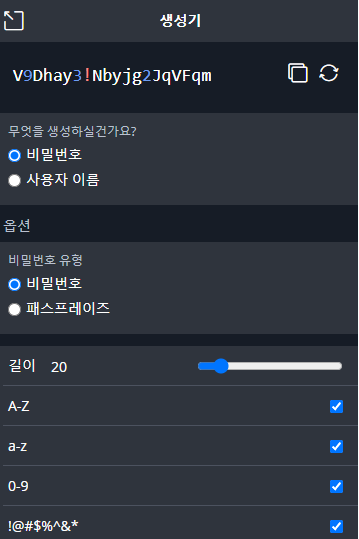
a password generator,
and Organization-based password sharing.
This is handy when you’re developing with others and need to share things like Slack Webhook URLs, environment variables, dev DB IDs and passwords, etc.
It also offers security audits — checking whether your password matches any leaked DB entries or whether you’re reusing passwords — and a SEND feature for transmitting sensitive data with end-to-end encryption.
However, since Bitwarden is open-source, you can self-host the password server, but to ensure high availability at production level, it requires high specs and a lot of configuration. (Bitwarden Install Docs )
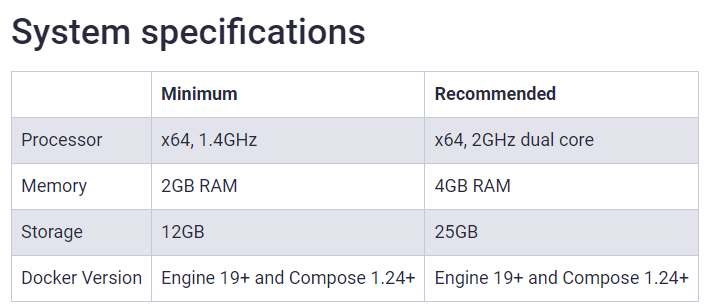
To solve this issue, there’s a project called Vaultwarden which is compatible with Bitwarden Clients but with reduced spec requirements, using SQLite as the database so you can run the server with just a single Docker Image.
While the official server requires 2GB of RAM, this server uses about 100MB of memory at idle, which means deploying via Fly.io makes it really easy to use!
Let’s follow the steps below to deploy a Vaultwarden server.
- Follow Fly.io Docs (Link ) to install flyctl for your OS, and complete the login process.
- Open a shell, create any folder (in my case I worked in
~/flyio/vaultwarden), and move into it. - Run the command below to create a
fly.tomlconfig file. Changeapp-nameto whatever you want. When prompted to choose a Region, I picked the closest one, Tokyo (nrt).
flyctl launch --name app-name --image vaultwarden/server:latest --no-deploy- Run the command below to create a Volume that will persistently store our data. Think of a Volume like an SSD that keeps the files alive even if the container dies. Match the app name with what you set in step 3, and similarly choose the closest Tokyo (nrt) region.
flyctl volumes create vaultwarden_data --size 1 --app app-name- Use the command below to create the Admin Token Secret that will be injected when the application starts. Think of
ADMIN_TOKENas the password for accessing the admin page. Pick a separate password so it doesn’t leak. We add this Secret value so we can enter the admin page for initial setup.
flyctl secrets set ADMIN_TOKEN=abc123456 - Edit the
fly.tomlfile in the folder, referencing the file below. You only need to modify the[env]section, the[mounts]section, and theinternal_portfield under[[services]]in the existing file.
app = "app-name"
kill_signal = "SIGINT"
kill_timeout = 5
processes = []

[env]
  ROCKET_PORT = 8080

[experimental]
  allowed_public_ports = []
  auto_rollback = true

[mounts]
  destination = "/data"
  source = "vaultwarden_data"

[[services]]
  http_checks = []
  internal_port = 8080
  processes = ["app"]
  protocol = "tcp"
  script_checks = []
  [services.concurrency]
    hard_limit = 25
    soft_limit = 20
    type = "connections"

  [[services.ports]]
    force_https = true
    handlers = ["http"]
    port = 80

  [[services.ports]]
    handlers = ["tls", "http"]
    port = 443

  [[services.tcp_checks]]
    grace_period = "1s"
    interval = "15s"
    restart_limit = 0
timeout = "2s"- From that folder, run the command below to deploy the app.
flyctl deploy- After deploying, run the command below to access the web page. Then click “Create Account” to create an account and a master password.
flyctl open- (Optional) Use the command below to enter the admin page, and log in with the
ADMIN_TOKENyou created above. Then configure any settings you need. In my case, I disallowed new sign-ups and turned off the invite feature.
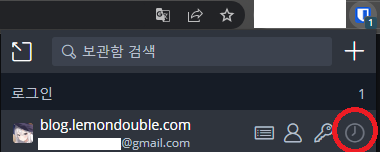
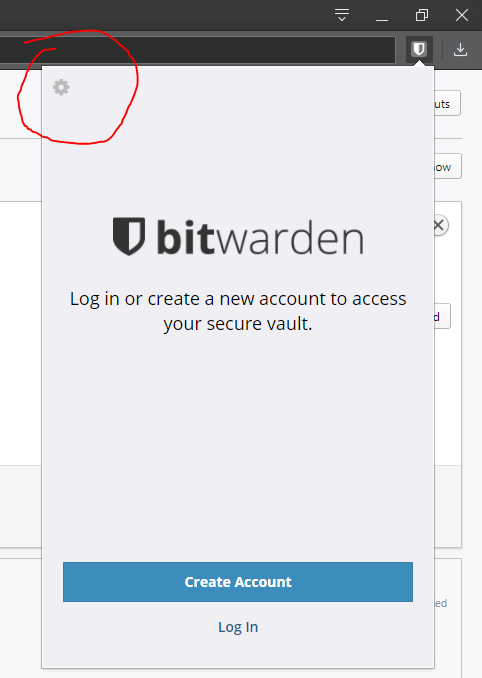
flyctl open /admin- Then download the Bitwarden client, click the arrow at the top left, and enter the address of your deployed application. You can enter
app-name.fly.devor the same web page you just visited.
Congratulations! If you’ve made it this far, your setup is complete!
From here on, you can enjoy a fairly convenient password manager.
Appendix 1. How do I add OTP? When adding an ID/Password, paste the Secret Key shown below into the TOTP field.

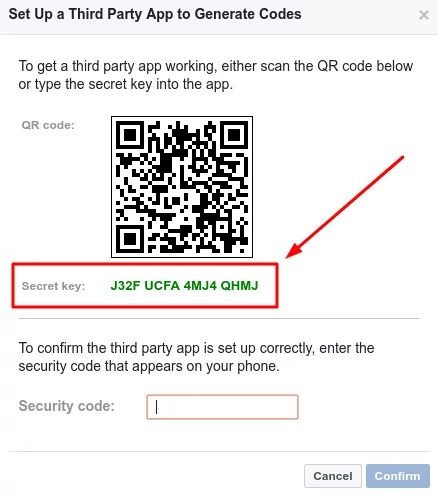
Just enter a Secret Key like the one above.
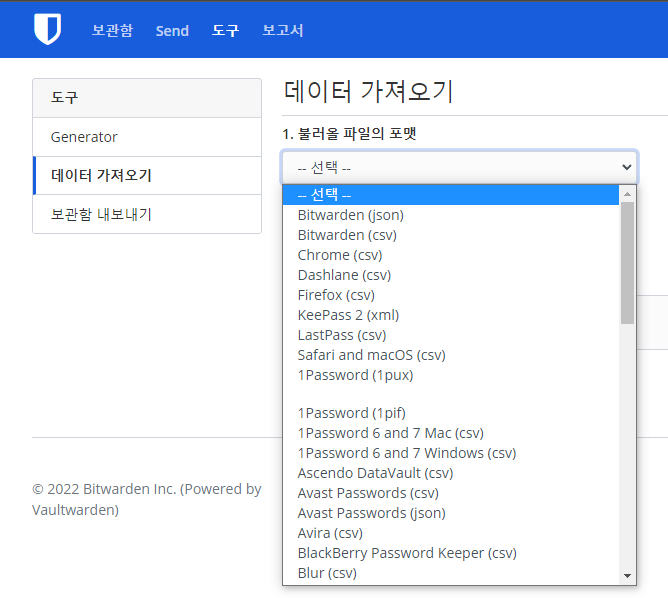
Appendix 2. Can I use the Google passwords I’m already using?
A. Yes, you can!
After exporting your passwords from the Google Password Manager,
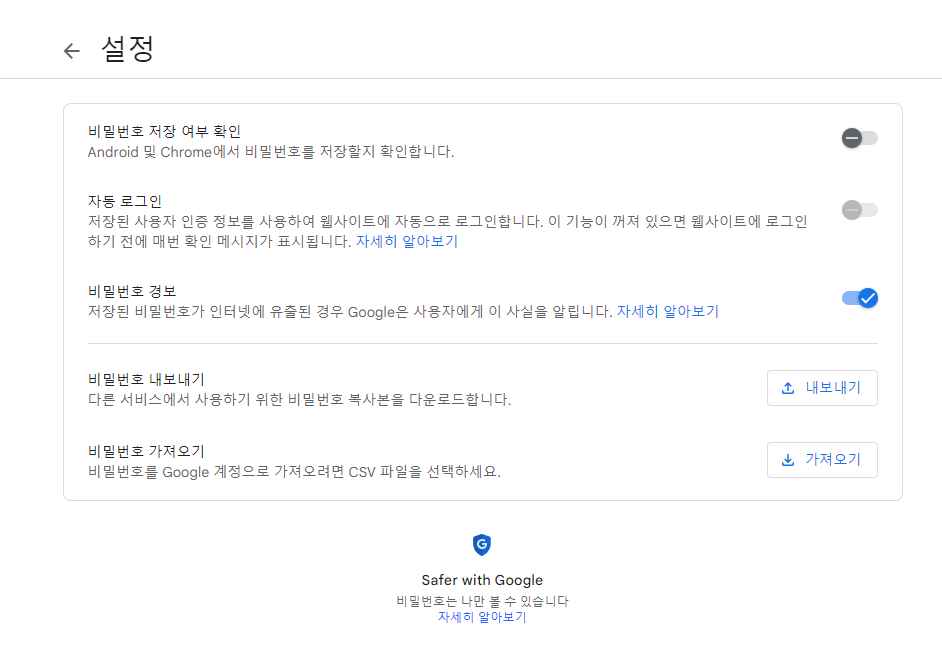
go to Vaultwarden Web Console -> Login -> Tools -> Import Data, and you can keep using the passwords you had in Chrome as-is.
Comments