Note: I’m based in Korea, so some context here is Korea-specific.
1. Add and Mount a New Disk
- This part is the same as a regular SSD / HDD mount! If something doesn’t work, feel free to search for
Ubuntu hard disk mountand follow along.
Connect the SSD or HDD to the Raspberry Pi.
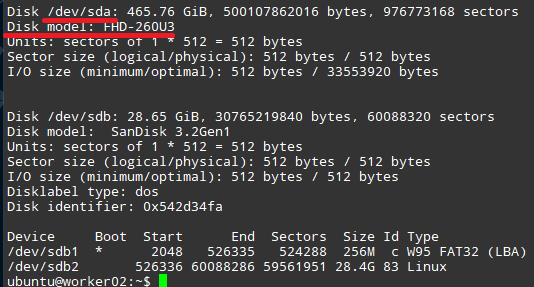
Run
sudo fdisk -lto find the name of the mounted hard disk. In my case, it’s/dev/sda.
- Carefully format the disk by running
sudo wipefs -a /dev/<disk you just identified>. (Example:sudo wipefs -a /dev/sda) - Run
sudo mkfs.ext4 /dev/<disk you just identified>to format the disk as ext4. - Run
sudo blkid -s UUID -o value /dev/<disk you just identified>to get the unique ID of the disk (in the form 680dfccb-9d8f-431c-ab3b-8c1e6c86e04f). - Create a folder to mount with
sudo mkdir /storage-ssd(the location is up to you; for convenience, I mounted it to a folder called/storage-ssdat the root). - Open
/etc/fstabwith sudo privileges and addUUID=7cf3fc21-74d6-4c01-a835-f8bd36bc3f7b /storage-ssd ext4 defaults 0 0to the very last line. (Mount to the folder created in step 6.) - Run
sudo mount -ato mount the disk you just registered.
2. Register the New Disk with Longhorn
Now let’s register the new disk with Longhorn!
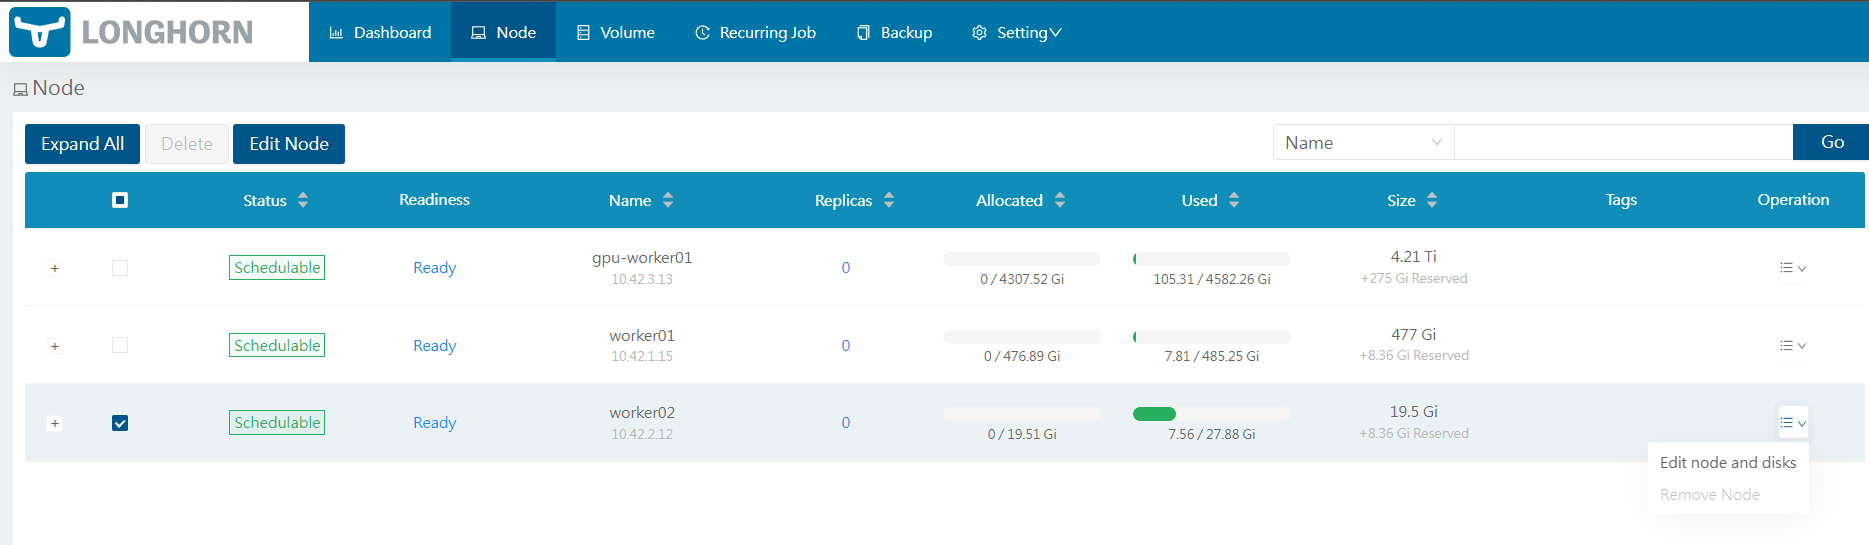
- Open the load balancer IP you set up earlier (
http://192.168.0.201/) in your browser. - Select Node -> the relevant Node -> Edit Node and disks.
In the disk tag field, enter the same tag as the
diskSelectoryou set when configuring the StorageClass to indicate that this disk belongs to that StorageClass. Then set the Path to the mount folder configured above.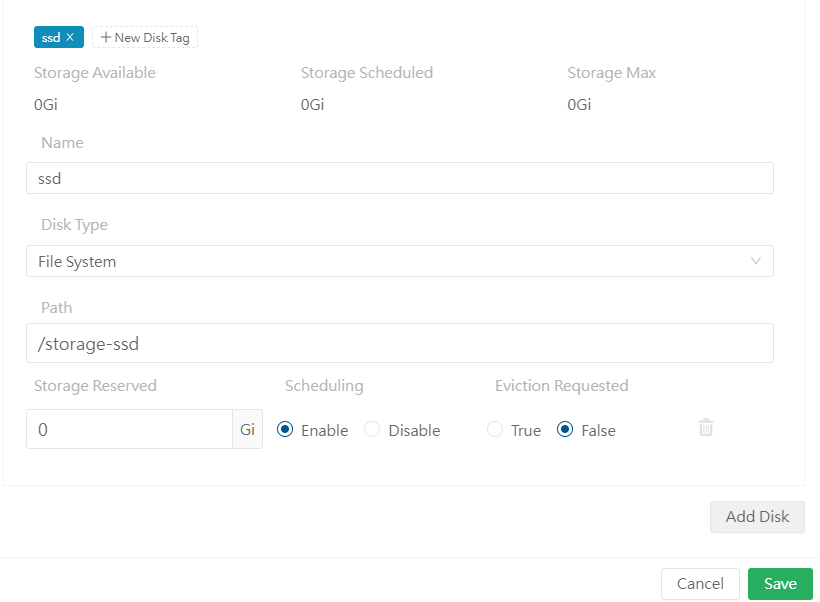
Click save and verify that the volume is recognized correctly.
3. Wrapping Up
Great work! You can now reliably supply a distributed storage system to subsequent applications using Longhorn!
Next, I’ll cover how to manage sensitive information like passwords through Git using Sealed Secrets, and after that I plan to set up a Private Docker Registry.
Thank you!
Comments